MB Tabs
MB Tabs helps you to put custom fields into tabs for a better view. Tabs can have icons and can be put on the left side of the meta box.

Tabs in the settings pages are created separately with different settings by the MB Settings Page extension. This extension is for grouping fields inside a field group only.
Creating tabs
First, you need to create custom fields as usual. Go to Meta Box » Custom Fields and create a field group with the custom fields you need.
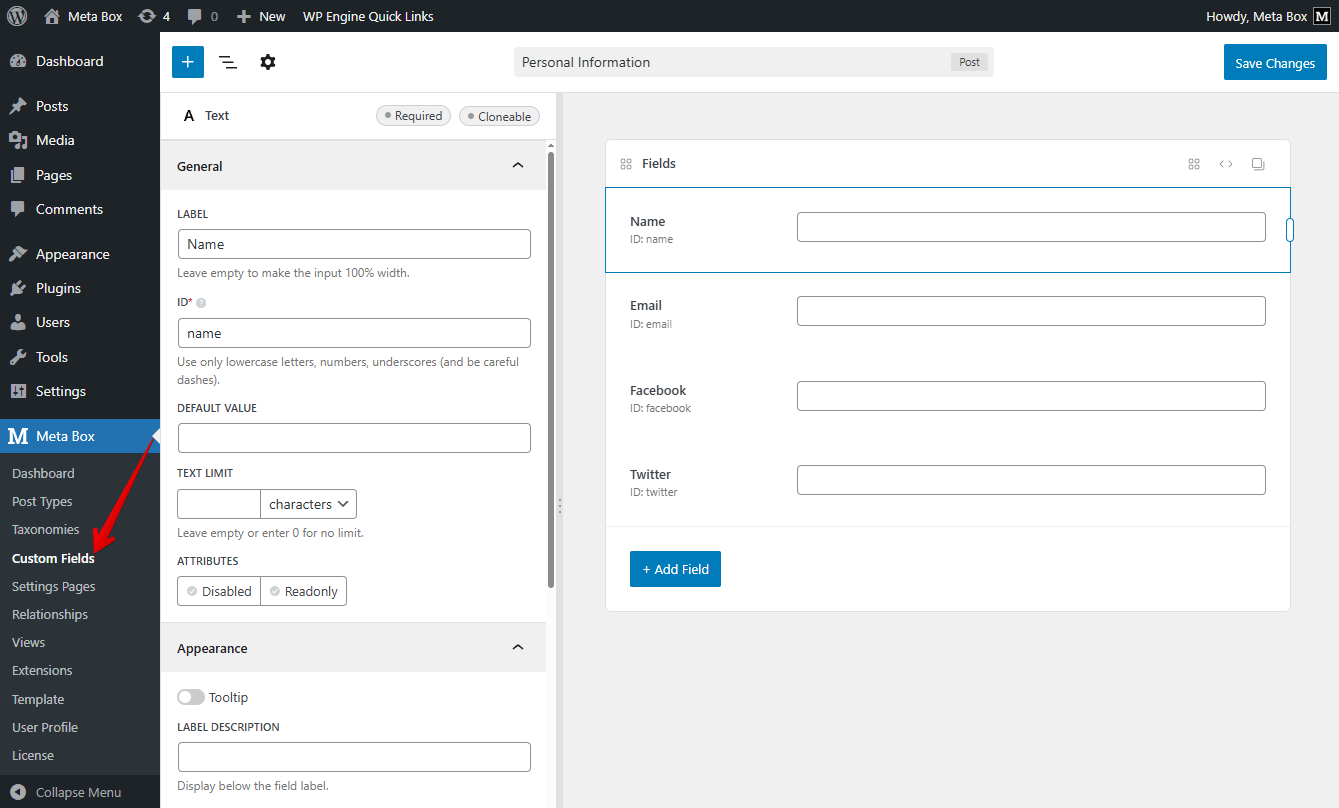
Then adding tabs to the field group. Tab is a special field type and is available in the field list.
The instruction above uses MB Builder, an extension providing the UI to create fields, and is already bundled in Meta Box Lite and Meta Box AIO. If you prefer to use code, please see below.
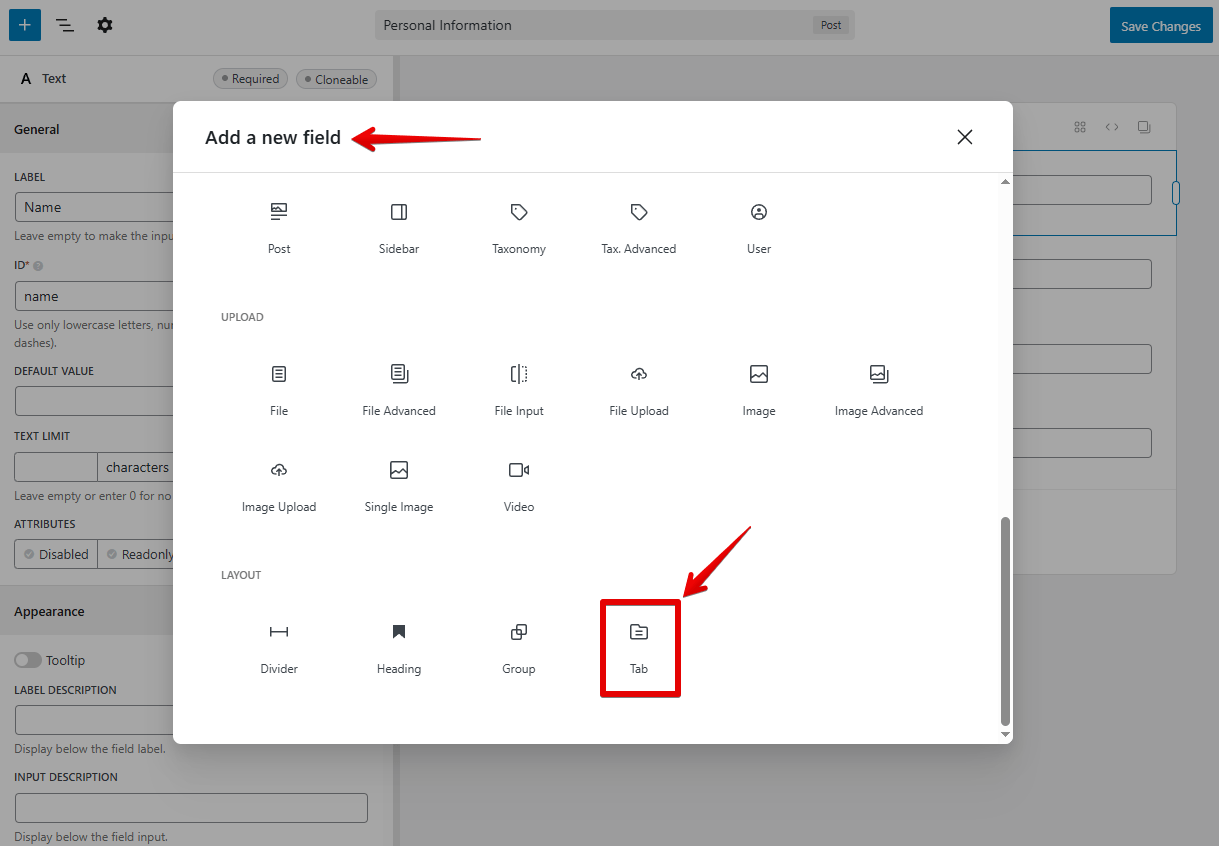
To add a tab, click the + Add Field button and search for Tab:
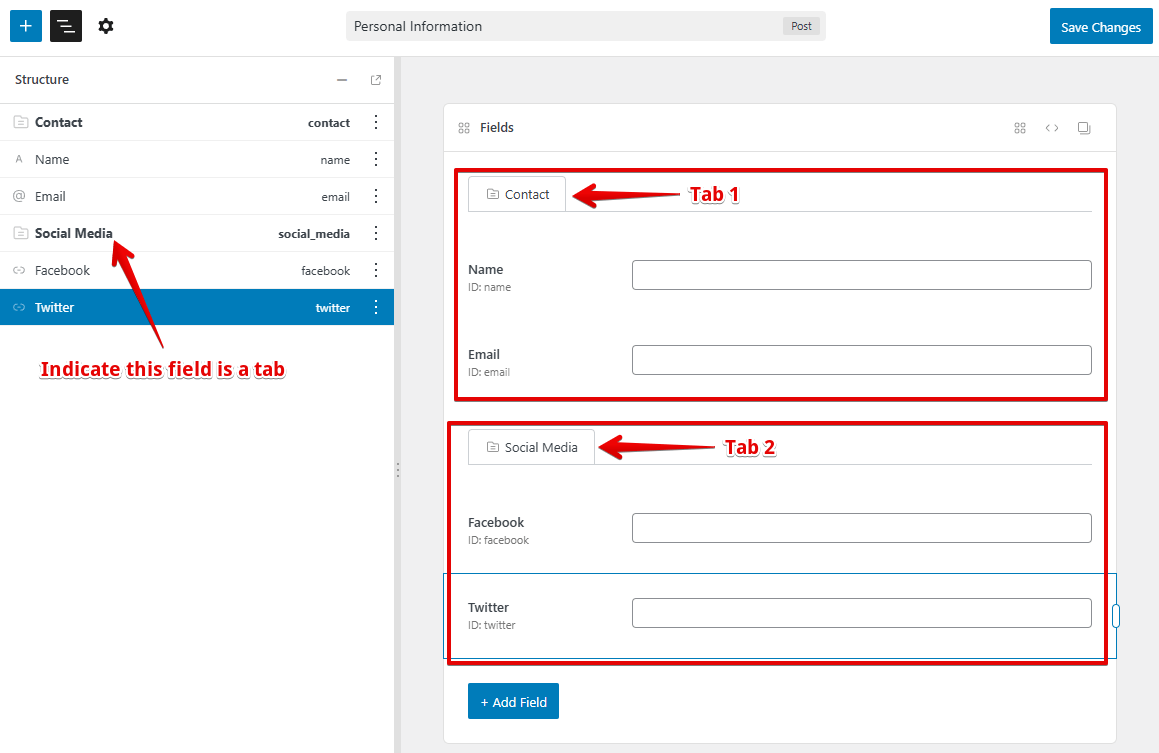
After adding tabs, you need to reorder tabs among the fields. The fields that follow a tab will belong to this tab.
Tab settings
Each tab has its own settings like label or icon. To see and change the tab settings, click the field on the preview, in the left panel, you can see:
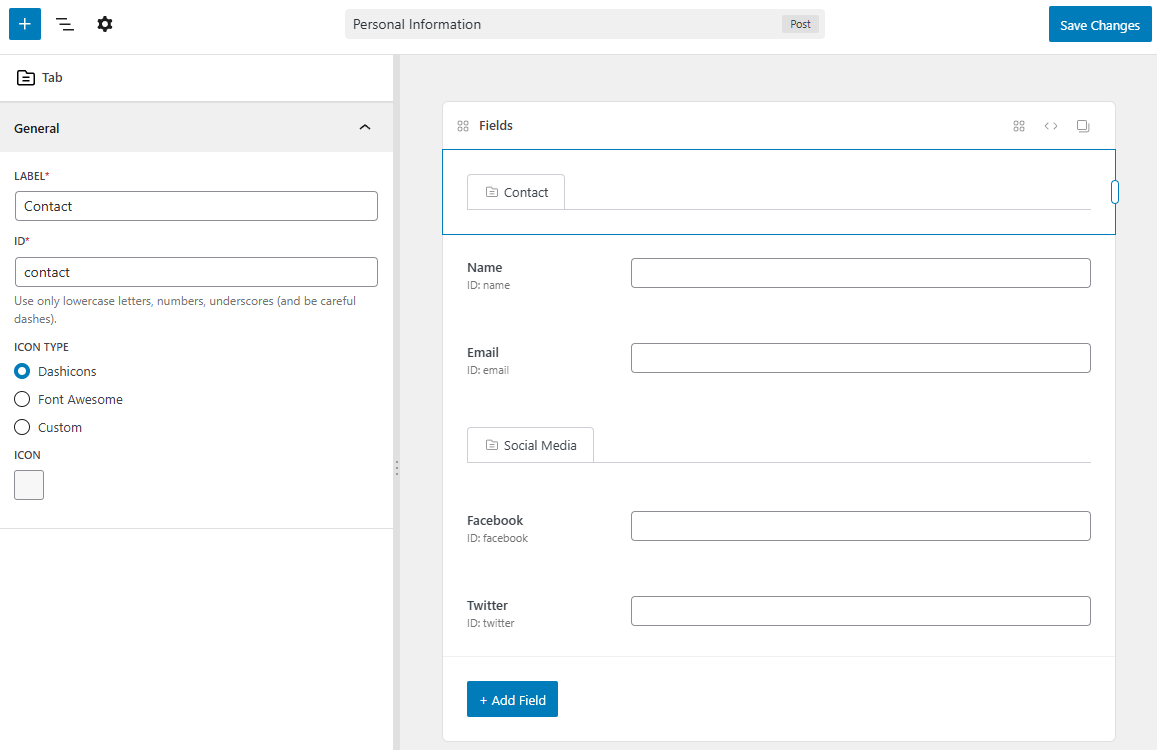
Below is the meaning of each setting:
| Name | Description |
|---|---|
| Label | The tab label |
| ID | The tab ID, which is used internally by the plugin |
| Type | The field type, must be "Tab" |
| Icon type | The icon type, you can choose between Dashicons (default), Font Awesome, or custom URL. Optional. |
If you choose the tab icon type Dashicons, you'll see a list of icons to pick from (as in the screenshot above).
If you want to use a FontAwesome icon for the tab, then select Icon type "Font Awesome" and enter the icon CSS class in the next input.
If you have a custom image for the tab icon, then select Icon type "Custom URL" and enter the icon URL in the next input.
Tab style
The plugin provides 3 styles for tabs: "default", "box", and "left" as you can see below:

To change a tab style, click on the Settings icon to have the field group settings, and choose one style in the Tab style:
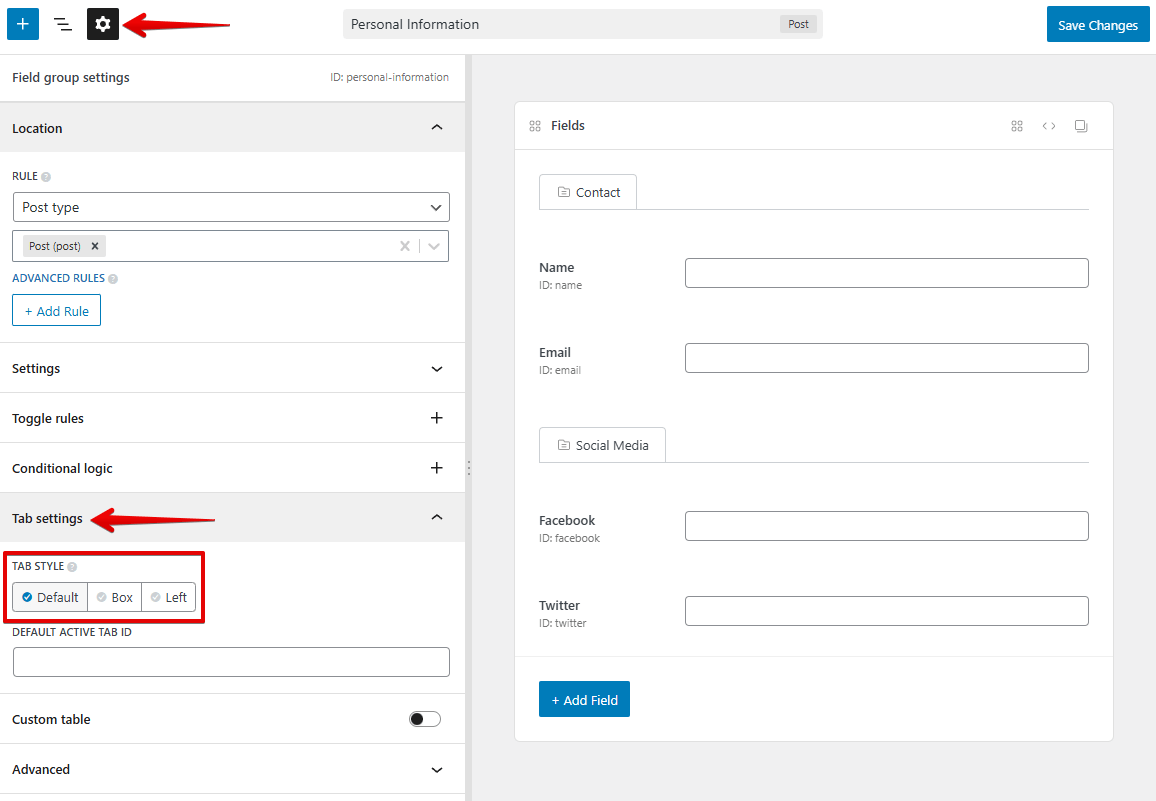
You can also set the default active tab here by entering the tab ID in the Default active tab ID.
Now you have your tabs ready. Please edit a post to see them in action!
Using code
If you're a developer and prefer using code to create tabs, this is a sample code to create simple tabs:
add_filter( 'rwmb_meta_boxes', function ( $meta_boxes ) {
    $meta_boxes[] = [
        'title'     => 'MB Tabs Demo',

        'tabs'      => [
            'contact' => 'Contact',
            'social'  => 'Social Media',
        ],
        'fields'    => [
            [
                'name' => 'Name',
                'tab'  => 'contact',
            ],
            [
                'name' => 'Email',
                'tab'  => 'contact',
            ],
            [
                'name' => 'Facebook',
                'tab'  => 'social',
            ],
            [
                'name' => 'Twitter',
                'tab'  => 'social',
            ],
        ],
    ];

    return $meta_boxes;
} );
To create tabs for your meta box, you need to add these parameters to your meta box settings:
| Parameter | Description |
|---|---|
tabs | Array of tabs. See below for details. |
tab_style | The tab style: default (like tabs for Categories), box (like tabs for Visual and Text modes of the main editor) or left (like tabs in the Help screen) |
tab_default_active | Default active tab ID. |
tab_remember | Remember the last active tab when saving the post. Boolean. Default is false. |
The list of tabs is defined in the tabs parameter. A tab can have or doesn't have an icon and can be set like this:
'tabs'      => [
    'contact' => 'Contact',       // No icon
    'social'  => [                // With icon
        'label' => 'Social Media',
        'icon'  => 'dashicons-share',
    ]
],
The plugin supports the following icon type for tabs:
- Dashicons: set
iconto the class name of Dashicons, e.g.dashicons-email. - Icon font: set
iconto the icon class name. For example, if you want to use Font Awesome, set'icon' => 'fa fa-home'. Note that you have to enqueue the CSS for your custom font icon yourself. The plugin only supports Dashicons by default. - Custom URL: set
iconto the URL of the image
Then for each field in the meta box, you need to specify which tab it belongs to by adding a parameter 'tab' => 'tab-id' where tab-id is one of the tab IDs you have registered above.